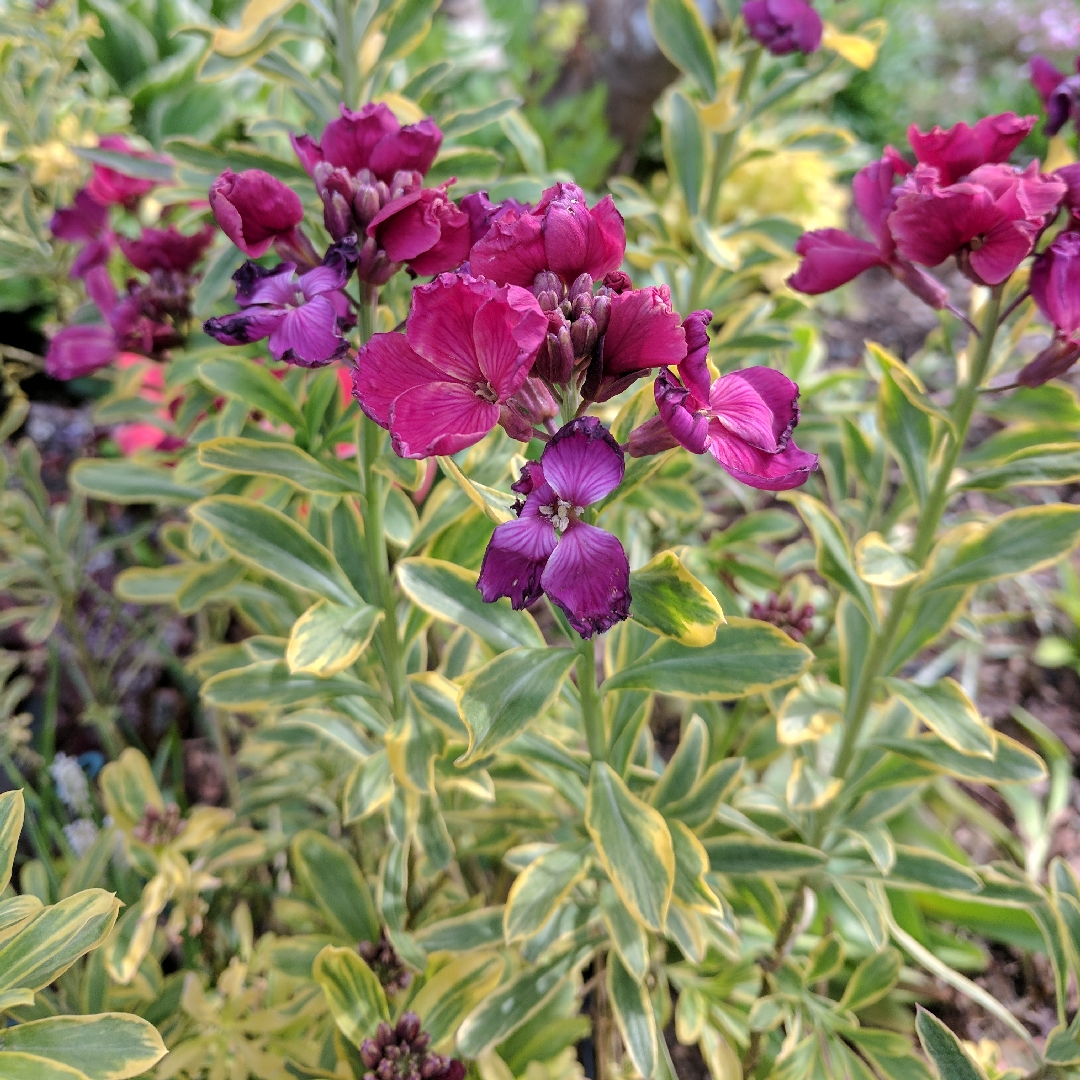
Erysimum 'Honeyberry'
Wallflower 'Honeyberry'
Erysimum's (or Wallflowers as they are commonly known as) are part of the Brassicaceae family and are originally native to southern europe. Most garden cultivars are derived from Erysimum x cheiri, which is native to South East Europe. They have long been associated with cottage gardens. Producing early, fragrant blooms, it is often used in spring bedding schemes. They are technically short-lived perennials, and will eventually develop a woody framework, however due to their susceptability to fungal and bacterial disease they are best grown as biennials and discarded after flowering. Despite this, some cultivars have proven to do well as perennials. Those that have a good perennial reputation tend to be evergreen throughout the year. Wallflowers are not difficult plants to grow in most soils, and as they are part of the Brassicaceae family they do very well in alkaline soils, but not so good in damp acidic soil. There are a range of colours available ranging from pinks, mauves, oranges, yellows and reds. Many are fragrant. 'Honeyberry' produces clusters of intense magenta flowers above variegated foliage. Shrubby and upright, with a lovely honey scent.
Contributed by @cathyh
-
Full sun to partial shade
-
Occasional watering
-
Full Frost Hardy: 5F (-15°C)
-
Free draining and fertile
Common name
Wallflower 'Honeyberry'
Latin name
Erysimum 'Honeyberry'
type
Biennial or short-lived perennial
family
Brassicaceae
ph
6.0 - 8.5 Acid - Neutral
Plant & bloom calendar
-
Best time to plant
full grown dimensions
 0.30 M
0.40 M
Erysimum 'Honeyberry'
Erysimum's (or Wallflowers as they are commonly known as) are part of the Brassicaceae family and are originally native to southern europe. Most garden cultivars are derived from Erysimum x cheiri, which is native to South East Europe. They have long been associated with cottage gardens. Producing early, fragrant blooms, it is often used in spring bedding schemes. They are technically short-lived perennials, and will eventually develop a woody framework, however due to their susceptability to fungal and bacterial disease they are best grown as biennials and discarded after flowering. Despite this, some cultivars have proven to do well as perennials. Those that have a good perennial reputation tend to be evergreen throughout the year. Wallflowers are not difficult plants to grow in most soils, and as they are part of the Brassicaceae family they do very well in alkaline soils, but not so good in damp acidic soil. There are a range of colours available ranging from pinks, mauves, oranges, yellows and reds. Many are fragrant. 'Honeyberry' produces clusters of intense magenta flowers above variegated foliage. Shrubby and upright, with a lovely honey scent.
Planting young plants
From Mid Autumn TO Early Winter
Wallflowers grow well in full sun or light shade and should be planted in a well drained soil. They grow best in cool, moist climates but once the plant has become established in the garden, it is very durable and can withstand a certain amount of drought. In cold climates, be sure to provide ample mulch in the winter. Plant wallflowers in masses with summer flowering bulbs or include a few in containers planted with summer blooms. Set them out in the growing position in late autumn for spring blooming the following year.
Propagation by cuttings
From Late Spring TO Late Spring
Propagation of growing wallflowers can also be done by cuttings in spring. Semi hard wood cuttings are taken from the current years growth from late spring the bottom of the cuttings is hard and soft on the top. With a sharp knife take a cutting of about 14cms, remove lowest leaves, dip end into rooting hormone, and place round the edge of a pot filled with a suitable compost, water well, they must remain moist till rooted, place under glass but in semi shade.
Propagation by seed
From Early Summer TO Mid Summer
Wallflowers are easily started indoors from seeds. Keep the temperature within the growing medium at 55°-65°. Germination will take place within 7-10 days. Pot up wallflower plants using free-draining compost, and grow them on in frost free conditions until large enough to plant outside. When plants are well grown, acclimatise them to outdoor conditions over 7 to 10 days before planting outdoors on free draining soil in full sun.


